Physical Computing: Assignment 2
November 11, 2020
Artist’s Portal
Concept
I’ve always been plagued by imposter syndrome, and its definitely stepping up since joining an incredible program full of amazing artists. I’ve always wanted to see the world the way that some of my peers or artistic inspirations do.
This semester I have been exposed to a lot of Machine Learning techniques and have been playing around with the idea of “seeing through an artists eyes.” I tried to create a VR style-transfer on the world around you, but technology (as I can create it) is not able to do that at a reliable speed or quality. So I thought, what would be a more “analog” way to do it.
Obviously I didn’t think of anything analog, but I took it back and decided to make a portal to someone else’s point of view, a TV.
For more in depth drawings/play test descriptions, visit here.
Demo Video:
Arduino
Building this circuit was not incredible complicated. It was mostly making sure that everything was in the right place and able to switch between states quickly and easily.
LED BUTTONS
I started with the LED buttons. I initially wanted the LED to turn on when pressed once, then off when pressed again. That functionality is documented here:
However, you’ll notice in the demo video, this is not how it functions. It ended up making far more sense to actually switch off when a different button was on, so that no 2 buttons could be lit at the same time. I tried to do it in a loop, but didn’t figure it out, so I used some conditionals.
for (int i = 0; i < 4; i++) {
    int buttonVals[] = {};
    buttonVals[i] = digitalRead(buttonPins[i]);
    if (buttonVals[0] == 1) {
      digitalWrite(ledPins[0], LOW);
      digitalWrite(ledPins[1], LOW);
      digitalWrite(ledPins[2], LOW);
      digitalWrite(ledPins[3], HIGH);
    }
    else if (buttonVals[1] == 1) {
      digitalWrite(ledPins[0], LOW);
      digitalWrite(ledPins[1], HIGH);
      digitalWrite(ledPins[2], LOW);
      digitalWrite(ledPins[3], LOW);
    }
    else if (buttonVals[2] == 1) {
      digitalWrite(ledPins[0], LOW);
      digitalWrite(ledPins[1], LOW);
      digitalWrite(ledPins[2], HIGH);
      digitalWrite(ledPins[3], LOW);
    }
    else if (buttonVals[3] == 1) {
      digitalWrite(ledPins[0], HIGH);
      digitalWrite(ledPins[1], LOW);
      digitalWrite(ledPins[2], LOW);
      digitalWrite(ledPins[3], LOW);
    }
    if (digitalRead(ledPins[i]) == HIGH){
      buttonPressed = i;
    }
  }
You will also notice a buttonPressed variable. That keeps track of which button is pressed, so that the Arduino will eventually send it to p5.
ROTARY SWITCH
This was simple to set up as well. A rotary switch is just x number of buttons (in my case, 3). So I was able to set up a loop, that kept track of what button was active via a variable.
  for (int i = 0; i < 3; i++){
    int rSwitchState = digitalRead(rotaryPins[i]);
    if (rSwitchState == 1){
      activeRotary = i;
      //Serial.println(activeRotary);
    }
  }
PROXIMITY SENSOR
This proximity sensor is the inspiration for approaching the piece. When not active, the screen will display static. If a person approaches the sensor, then a “1” (true) will be sent through the serial port.
  //PROXIMITY SENSOR
  digitalWrite(proxTrig, LOW);
  delayMicroseconds(2);

  digitalWrite(proxTrig, HIGH);
  delayMicroseconds(10);
  digitalWrite(proxTrig, LOW);

  duration = pulseIn(proxEcho, HIGH);
  distance = duration * 0.034 / 2;

  if (distance <= proximityThreshold) {
    activeTV = true;
    //Serial.println(activeTV);
  }
  else {
    activeTV = false;
  }
Send Data
Then, I sent a comma separated string to p5 via Serial.print
  //PRINT
  Serial.print(buttonPressed);
  Serial.print(",");
  Serial.print(activeRotary);
  Serial.print(",");
  Serial.println(activeTV);
This was eventually grabbed by p5.js and attached to variables there.
Circuit
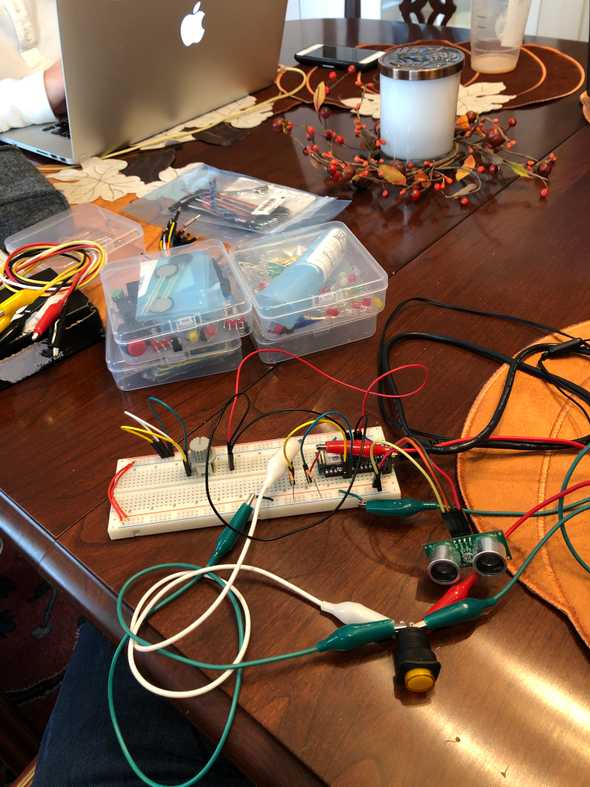
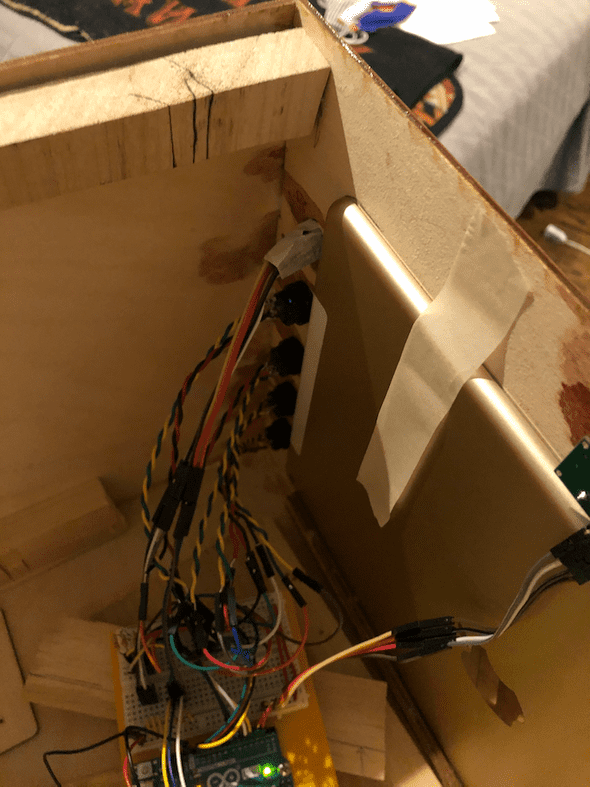
Here is the circuit I made! I wish I spent more time on cleaning the circuit up.
p5
I actually did 2 full p5 sketches for this project.
The first one used ML5.js to dynamically change styles and live process them. Its logic functioned perfectly, but it takes far too long to process the vides and runs anywhere from 1 frame per second to 1 frame per minute.
Ultimately, I chose function over form. What good is a well written and thought out piece of code if the use-ability is 0?
as such, I decided to pre-process the videos using RunwayML’s fast style transfer model. I downloaded these and uploaded them to a p5 sketch.
The way this sketch worked was using these lines of code:
function serialEvent() {
  let inString = serial.readStringUntil('\r\n');

  if (inString.length > 0) {
    var sensors = split(inString, ',');
    if (sensors.length > 2) {
      modelSelector = sensors[0];
      videoSelector = sensors[1];
      isOn = sensors[2];
      //console.log(isOn);
    }
    //serial.write('x');
  }
}
This is the serialEvent function that cuts out the commas and assigns them to modelSelector and videoSelector, and isOn.
modelSelector and videoSelector
The way the videos are saved is via a nested array. So, the array looks like [[cnn1, cnn2, cnn3, cnn4], [w,x,y,z], …], videoSelector will identify which video to reference, and modelSelector will select which video in the array to draw to the screen.
let current = videos[videoSelector][modelSelector];
image(current, 0, 0, width, height);
current.volume(1);

//if the video is different, mute it
if (current != previousVid){
   previousVid.volume(0);
}
previousVid = current;
isOn
When the isOn variable == 0, the sketch will draw static instead of the videos. This inspires a user to approach the piece in order to figure out what it is.
img = createImage(100, 100);
      img.loadPixels();
      for (let y = 0; y < img.height; y++){
        for (let x = 0; x < img.width; x++){
          // let index = (x+y*img.width)*4;
          let bright = random(255);
          img.set(x,y,bright)
        }
Fabrication
Bill of Materials
- 1x Arduino Uno/Nano 33IoT
- 1x LCD Display (iPad in this example)
- 1x 3 Position Rotary Switch
- 4x LED momentary Rotary Switches
- 1x Ultrasonic Proximity Sensor
- 1x Wooden Housing of your design
- 3x Legs
Build
For this project, I wanted to use the laser cutter to accurately cut my housing. I spent a while in Illustrator measuring things out, designing interconnecting pieces, and thinking of how I want to layout the piece. Eventually, I got what I was happy with.
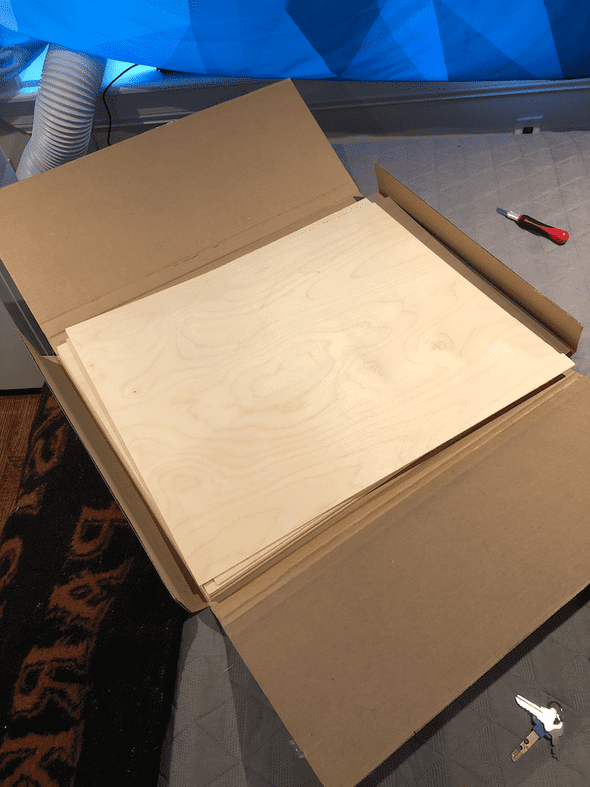
I tried to buy some 1/8in plywood at the hardware store near me, but it did not come that small, so I needed to visit amazon.com. I found a set of eight 24x18in 1/8in birch plywood that is approved for the printer.
Unfortunately, the laserCutter I wanted to use was broken at the time. So after re-strategizing, I re-made a couple of the interconnecting pieces and decided to find a way to drill them together. Then, I used the BandSaw to make my wood 24x12in (6in shorter).
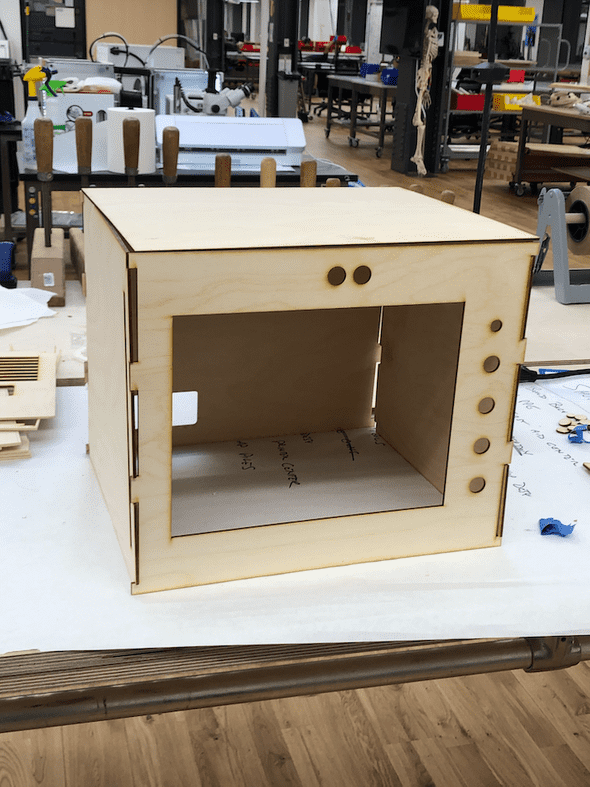
After running the printer, I ended up with this.
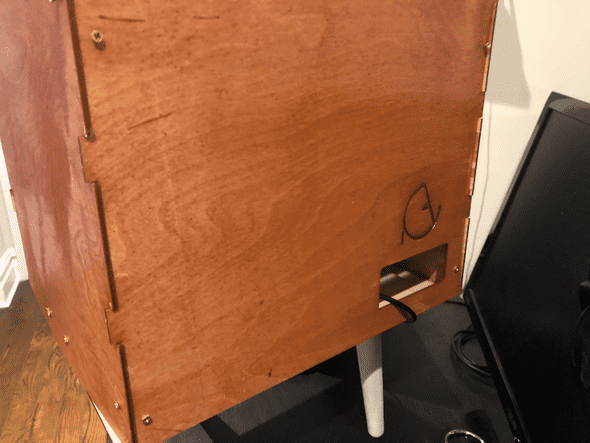
I also burned my new Logo into it!!
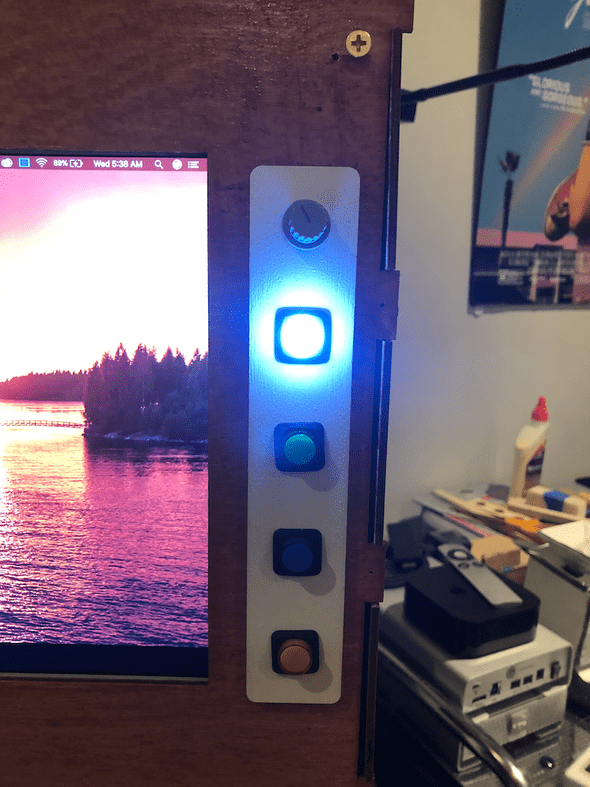
Afterwards, I sanded down the cut wood and the legs (which I found on the street). I stained the wood with a cherry gel stain and spray painted the legs and button panel white.
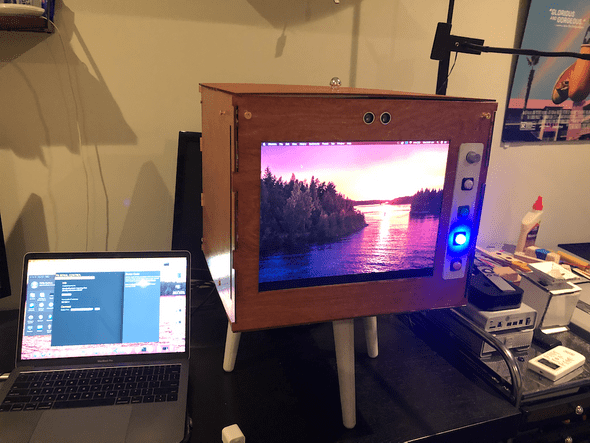
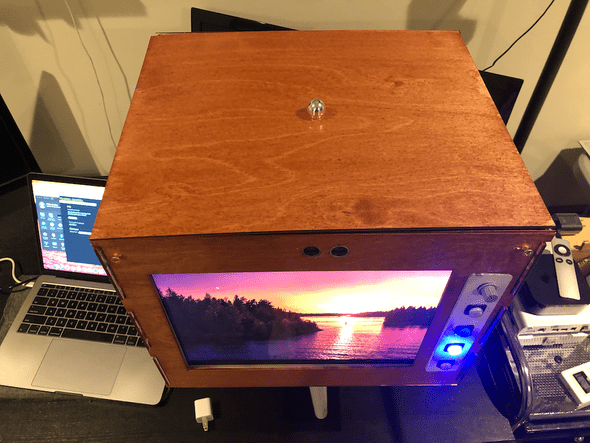
After a very long and painful building process (I will explain below), this is what my piece looks like!
Known Issues
iPad
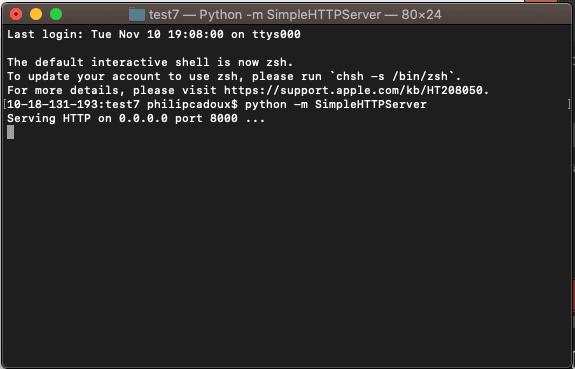
The goal with the iPad was to run a local server out of the Mac Terminal using Python
This would have worked under normal circumstances, but iOS seems to block autoplay of videos. Because of this, there is no way to get the actual channels to display. I tried setting up a button that will manually start the videos (so they aren’t automatic), but that yielded no results.
As such, I used the sideCar feature to use the iPad as a second monitor. Only downside to this is sometimes my computer cries for running multiple screens. Also, a small grievance is I couldn’t figure out how to hide the URL bar on the top.
p5 and Videos
I have no issues with the arduino or serial communications. The issues lay in p5 and how it processes/loads videos. Even though I am only drawing one video per draw loop, it has a hard time handling this many videos (12). It seems to randomly decide which videos to start and how many. Sometimes a video will also just pause for no reason, which throws the rest of the videos out of sync (making the illusion of continuity between videos vanish).
I will also get some seemingly random errors involving start(), stop(), pause(), and loop(). I know it feels silly to say “random error,” but while I can recreate it for one case, it will occur in another for seemingly no reason. What I have presented here is the most frequently successful version I’ve made.
I have exhausted my repertoire of coding skills trying to implement workarounds for what appears to simply be the limitations of p5. I have asked plenty of people on the floor, but nobody could come up with any solutions I hadn’t already tried :(
I think my next step is to try either combining the videos and jumping around the frames (a solution that may relieve p5 of some loading stress) or try a new environment entirely (Max/MSP, touchDesigner, Processing).
Lessons Learned
Pieces Fitting
I’m sure this would have worked better if I didn’t have to redesign my box last-minute, but the teeth of the box don’t interconnect in any meaningful way. They just fit within each other, but don’t stitch together in a way that maintains shape. Lesson Learned
Fabrication Planning
Similar to the above, I didn’t have a clear or successful plan for how to put the pieces together. This piece is held together by a myriad of screws, wood scraps, and hot glue.
Staining and Sanding
Stain is very stick, wear gloves. Sand between layers. Clear finish takes 24 hours to cure. Do this ahead of time…
Written by Philip Cadoux, current ITP student and Creative Technologist. Follow me on Instagram
