Physical Computing: Week 08
November 03, 2020
Labs
I read through the labs to understand the material, but I was lacking all of the sensors. I understand that was probably my bad, but I am in NH this week and there is simply nothing I am able to do about it.
Instead, I decided to spend an equivalent amount of time working on my Assignment 2, here is what I did.
Project 2 Updates:
Housing
For this project, I wanted to use the laser cutter to accurately cut my housing. I spent a while in Illustrator measuring things out, designing interconnecting pieces, and thinking of how I want to layout the piece. Eventually, I got what I was happy with.
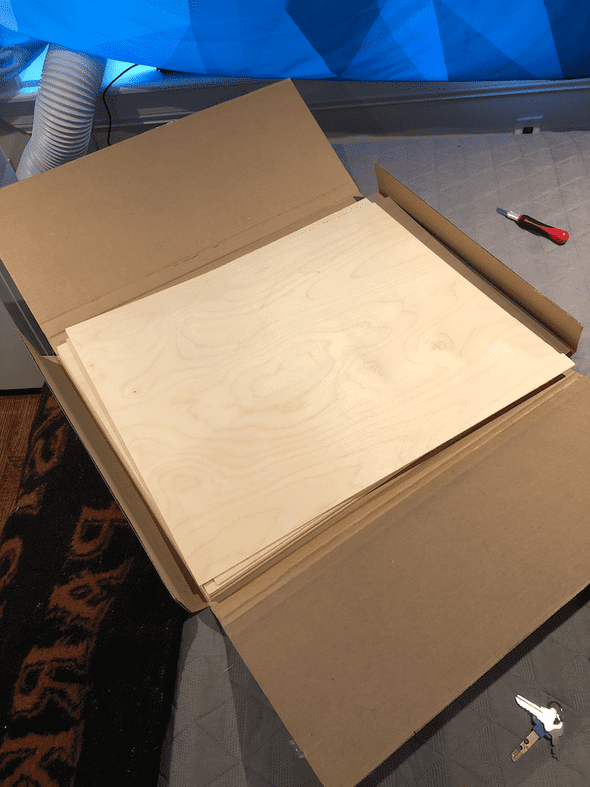
I tried to buy some 1/8in plywood at the hardware store near me, but it did not come that small, so I needed to visit amazon.com. I found a set of eight 24x18in 1/8in birch plywood that is approved for the printer.
I got to the floor and asked to use the big printer. Ben tried to get it working, but it had an issue (it has since been fixed).
Because of this, I needed to re-strategize to use the smaller because I needed to print that day (I am currently in NH).
I re-made a couple of the interconnecting pieces and decided to find a way to drill them together. Then, I used the BandSaw to make my wood 24x12in (6in shorter).
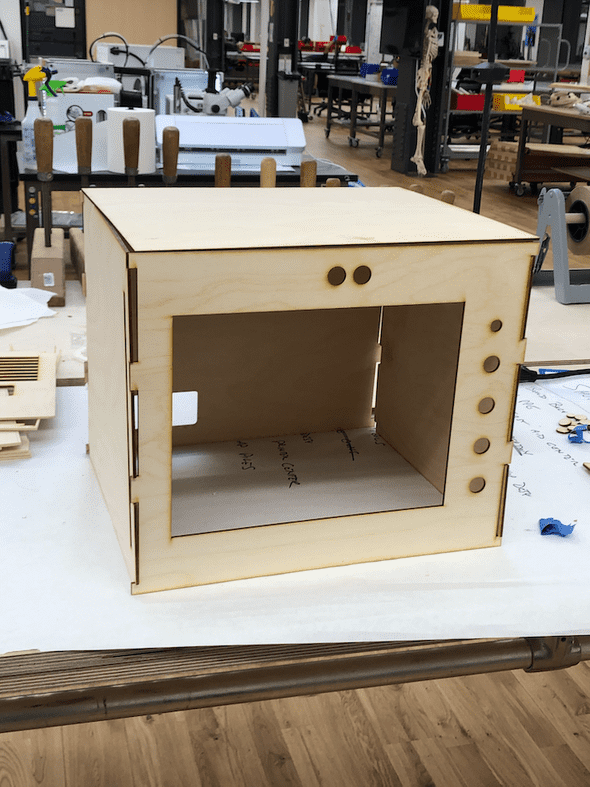
After running the printer, I ended up with this, which I am planning to stain with a cherry finish and drill together. My components also all fit, which is fantastic.
I also burned my new Logo into it!!
Sensors
For this, I had to learn a few new sensors/components. I will document my code, some notes, and an image below.
LED Buttons
These worked out really simply because the LED is separate from the button. Since these are momentary buttons, the hardest part was working out how to get the light to turn on and off, but remember whether it is “on” or “off”.
//LED Buttons
  int switchState = digitalRead(buttonPin);
  if (switchState == 1 && lastSwitchState == 0) {
    if (buttonPressed == 0) {
      buttonPressed++;
      digitalWrite(ledPin, LOW);
    }
    else if (buttonPressed == 1) {
      buttonPressed = 0;
      digitalWrite(ledPin, HIGH);
    }
    Serial.print("Button On/Off: ");
    Serial.println(buttonPressed);
  }
  if (switchState == 0 && lastSwitchState == 1) {
    Serial.println("Switch Released");
  }
  lastSwitchState = switchState;
Proximity Sensor
This wasn’t hard to set up, to be honest, the harder part was understanding the code. I was able to get it functioning, but it uses delayMicroseconds(), which makes me nervous for serial communication. You’ll notice my code has “activeTV” and “proximityThreshold” variables, which will allow my code to know whether to display static or not.
Proximity Sensor
  digitalWrite(proxTrig, LOW);
  delayMicroseconds(2);

  digitalWrite(proxTrig, HIGH);
  delayMicroseconds(10);
  digitalWrite(proxTrig, LOW);

  duration = pulseIn(proxEcho, HIGH);
  distance = duration * 0.034 / 2;

  Serial.print("Distance: ");
  Serial.println(distance);

  if (distance <= proximityThreshold) {
    activeTV = true;
  }
  else {
    activeTV = false;
  }
Rotary Switch
This was as simple as setting up 3 buttons. I don’t have a video/images, but I had issues with this to begin with because I had a brain fart and didn’t plug any of it in.
I also had to stop working on this code, so I have not tested it. This likely doesn’t work as it is now, but my serial port suddenly stopped appearing, so I took that as a sign to take a break. You should still be able to see what I’m thinking about with the below code.
  //Rotary Switch
  for (int i=0; i < sizeof(rotaryInputs); i++){
    int rSwitchState = digitalRead(rotaryInputs[i]);
    Serial.print("Pin");
    Serial.print(rotaryInputs[i]);
    Serial.print(": ");
    Serial.println(rSwitchState);
   }
  int rSwitchState = digitalRead(rotary1);
  Serial.println(rSwitchState);
Circuit
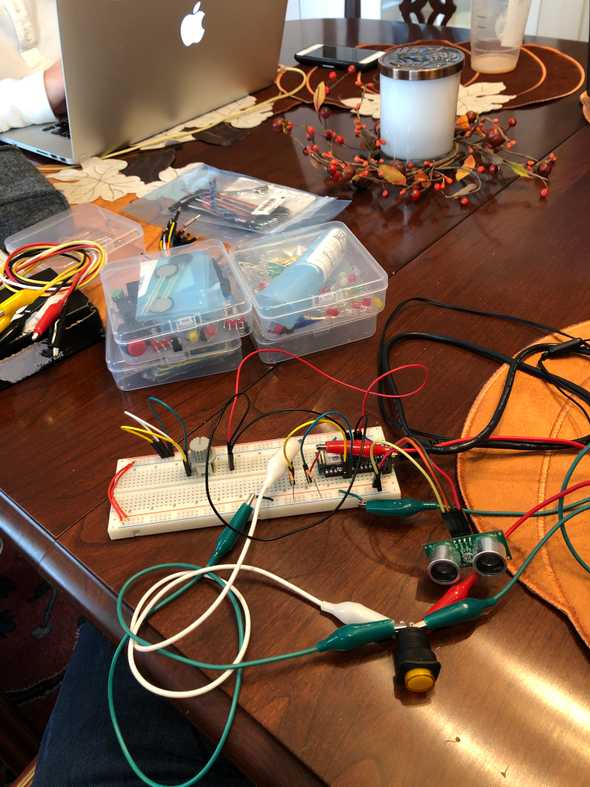
Here is the circuit I made for testing. This is too messy to use, but it shows my tinkering process.
Written by Philip Cadoux, current ITP student and Creative Technologist. Follow me on Instagram


